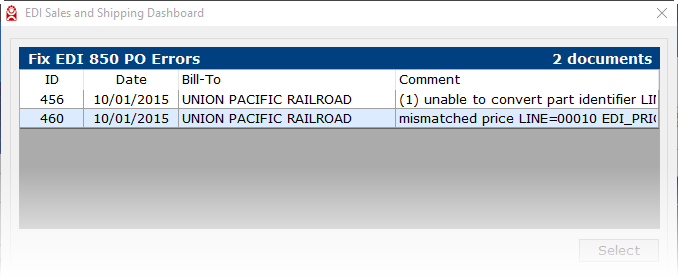
Addressing EDI errors is a daily task. The following encompasses the steps for personnel who review inbound EDI 850 Purchase Orders (PO). The panel on the “EDI Sales and Shipping Dashboard” screen, titled “Fix EDI 850 PO Errors”, will display a list of the PO’s which have one or more of the following types of error’s that need resolution before the order is created:
1. Unrecognized Ship-To: The Ship-To address is incomplete or does not match any customer record or may need to be changed for business reasons.
2. Part Number Mismatch: The part number in the EDI document is either missing or cannot be matched to any part number in the system.
3. Pricing Mismatch: Price totals for part(s) is either higher or lower than the price defined for your customer (trading partner).
The following steps describe how to select an EDI document and resolve errors and/or exceptions.
On the “EDI Sales and Shipping Dashboard” screen, there is a panel titled “Fix EDI 850 PO Errors”. Select a row and then click the SELECT button or double click on the row. The “Edit EDI 850 Purchase Order” screen will display. If there are no Purchase Orders displayed on the “Fix EDI 850 PO Errors” panel, there are no EDI 850 errors to correct.
Confirm that the Ship-To address is correct. If correct, go to Step 3.
At times the EDI document may contain an address where the order is to be shipped and address not recognized in the AutoPower system. This could be a drop-ship address or one that the system could not match
For business reasons you may want to assign this to a known Ship-To in the system without changing the EDI address.
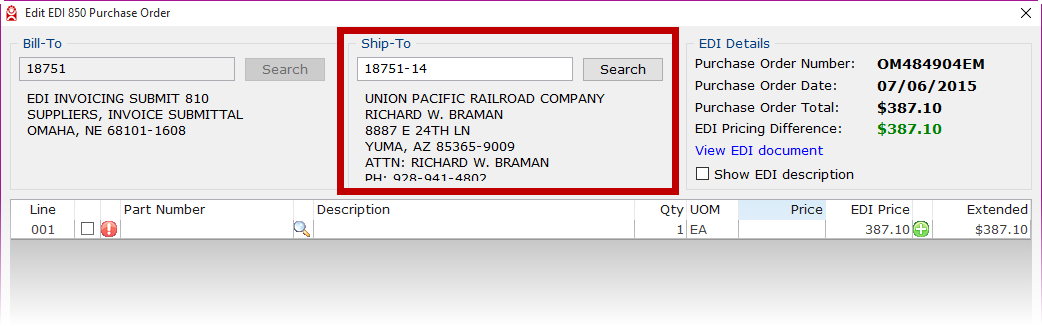
If the Ship-To information is incorrect, click the “Search” button to display the “Customer Search” screen. The “Customer Search” screen is used to search customer records using one of the following parameters:
Customer Number
City
Phone Number
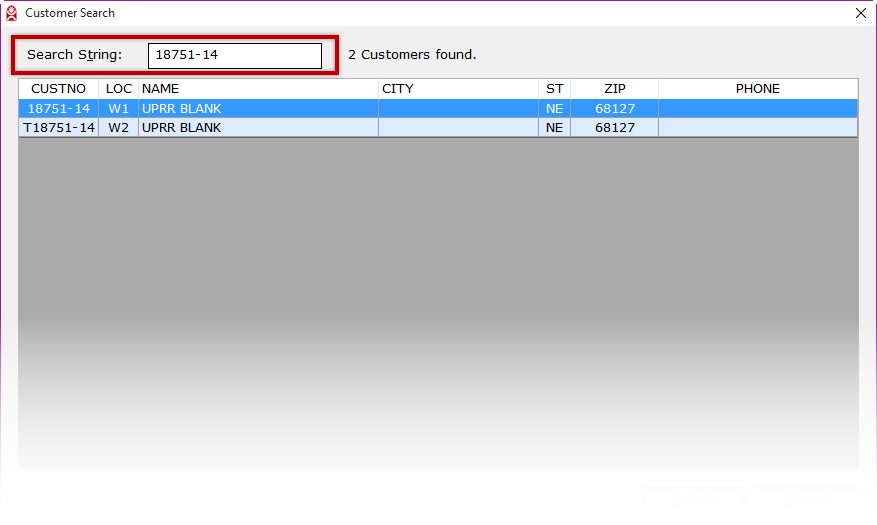
To perform a customer search, input one of the above parameters and press ENTER. Possible customer matches will display in the grid providing the customer number, default warehouse location, customer name, city, state, zip code and phone number.
Alternately, you can input one of the above parameters into the Ship-To area of the “Edit EDI 850 Purchase Order” screen and press ENTER. The “Customer Search” screen will display along with the possible customer matches.
To select a Ship-To match, click on a row in the grid (A) and then click “Select” (B). Alternately, double click on a row to select the Ship-To.
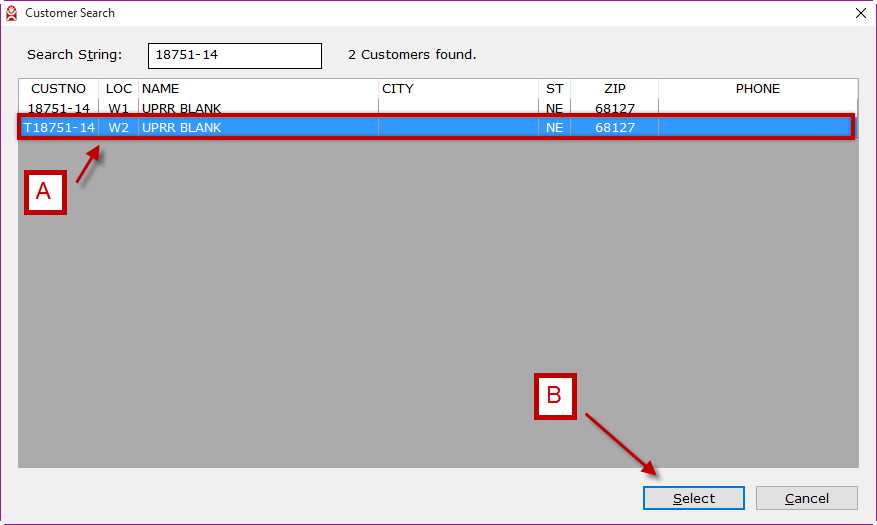
The selected Ship-To information will be loaded into the Ship-To area of the “Edit EDI 850 Purchase Order” screen.
To exit the “Customer Search” screen with no selected customer, click the “Cancel” button at the bottom of the screen or the X in the upper right of the screen.
Review the EDI Details area that displays the Purchase Order Number, Date, Purchase Order Totals, and EDI Pricing Differences.
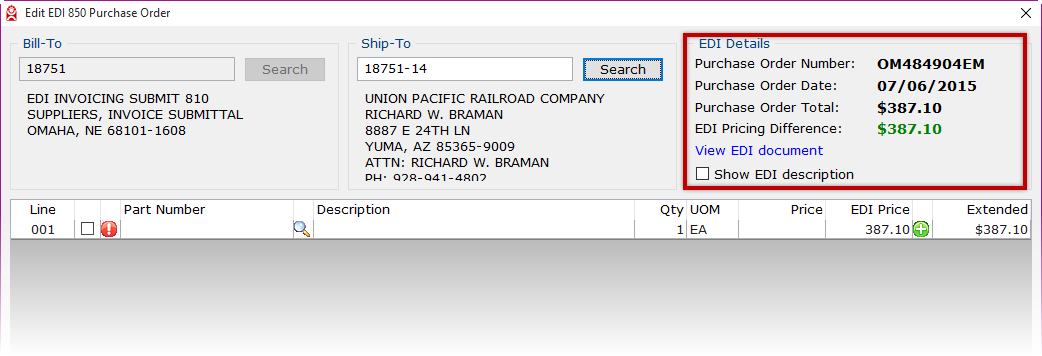
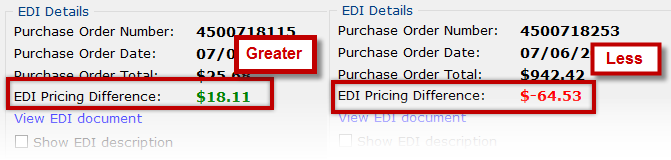
The EDI Details area displays pricing differences between the customers established pricing and the EDI document pricing. If the difference is greater than the customer’s pricing, the total will display as a positive number in green. If it’s less than the customer’s pricing, the total will display as a negative number in red. How to address pricing differences is covered in Step 5.
Some optional error resolution features are also available in the EDI Details area.
View EDI Document
The EDI Monitor - Details screen will display a “Status”, where details of the error are provided. The error is also visible in the comments area of the status log. This provides you information about what needs to be resolved before the order can be created in the system. Click the “Close” button to exit the EDI Monitor - Details screen or the X in the upper right of the screen.

Show EDI Description
Placing a check mark in the check box next to “Show EDI description” displays in the grid the detailed part description provided in the EDI document in the grid for all line items. The EDI part descriptions detail may provide useful information to resolve missing or invalid part numbers on the EDI Purchase Order.

In the grid displayed on the “Edit EDI 850 Purchase Order” screen, a red round exclamation mark icon may display in the column to the left of the part number. If present, this icon indicates an unrecognized, invalid or missing part number.
To resolve part number issues you can input a correct part number or use the magnifying glass icon to the right of the part number to display the “Part Search” screen.
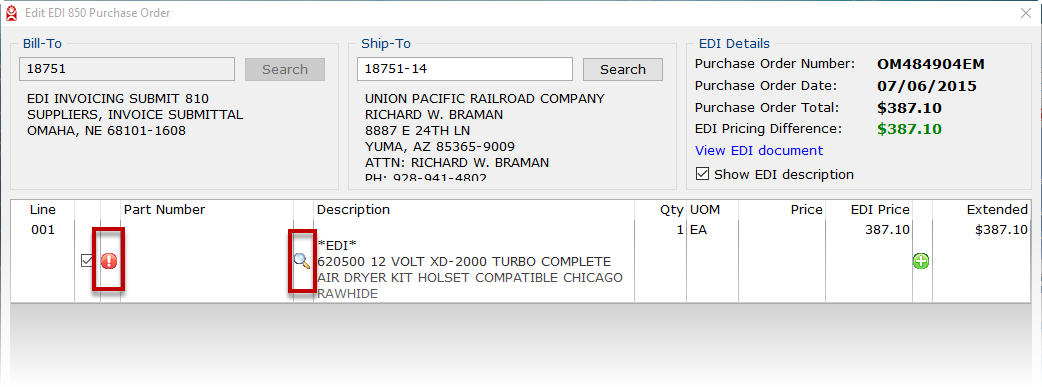
Often the EDI part description details will be an indicator of what part search may help resolve part number issues. Individual line item part descriptions detail can be shown clicking the checkbox next to the line number for any line item.
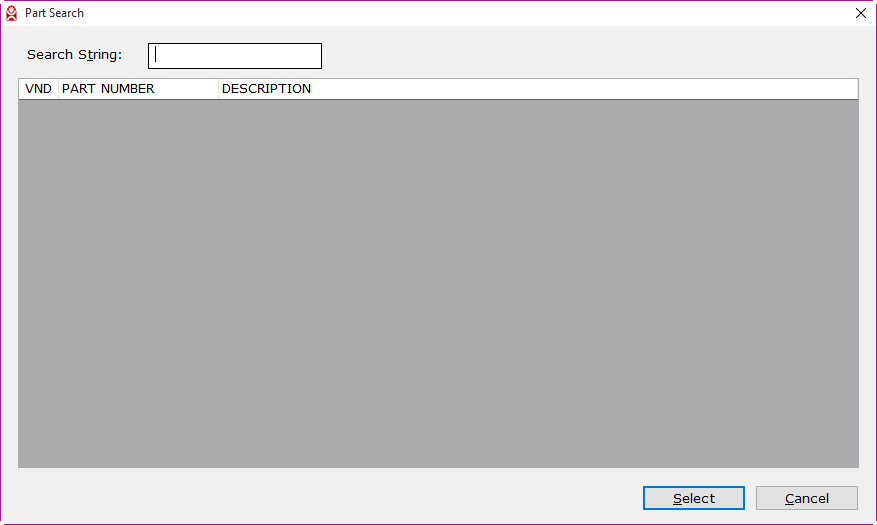
The “Part Search” screen is used to search for a part number using one of the following input parameters:
Part Number
Vendor Code
Part Description
To search, input one of the above parameters and press ENTER.
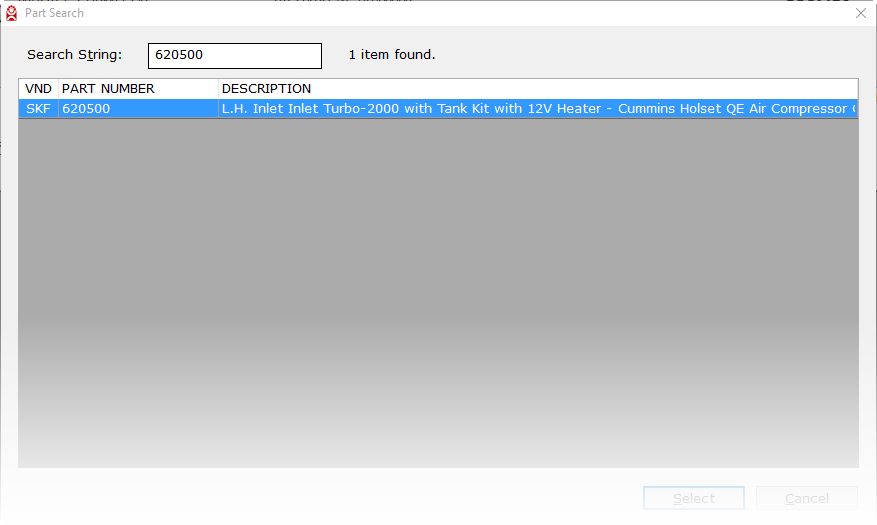
Once you have identified the correct part number, click on a row in the
grid (A) and then click “Select” (B). Alternatively, double click on a
row to select the part number.

The “Part Search” screen will close and the selected part number will display on the “Edit EDI 850 Purchase Order” screen. To exit the “Part Search” screen with no part number selected, click the “Cancel” button at the bottom of the screen or the X in the upper right of the screen.
If a price difference exists between the EDI PO and the customer part price, the difference is indicated by icons displayed in the column to the right of the EDI Price.
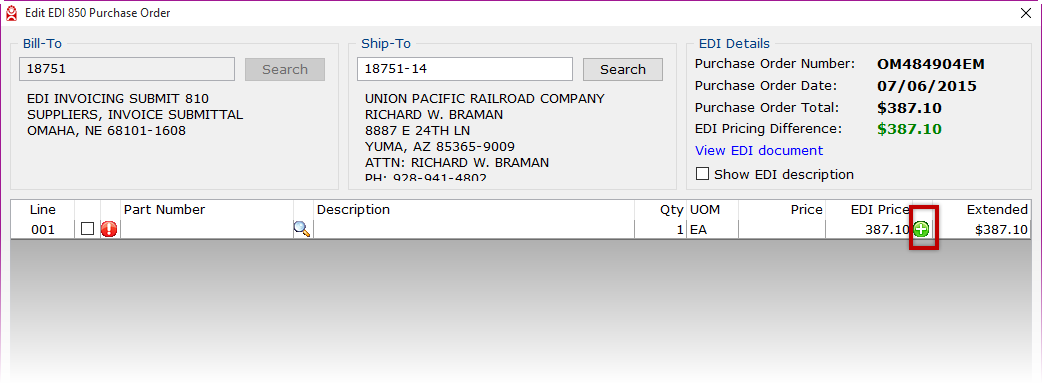
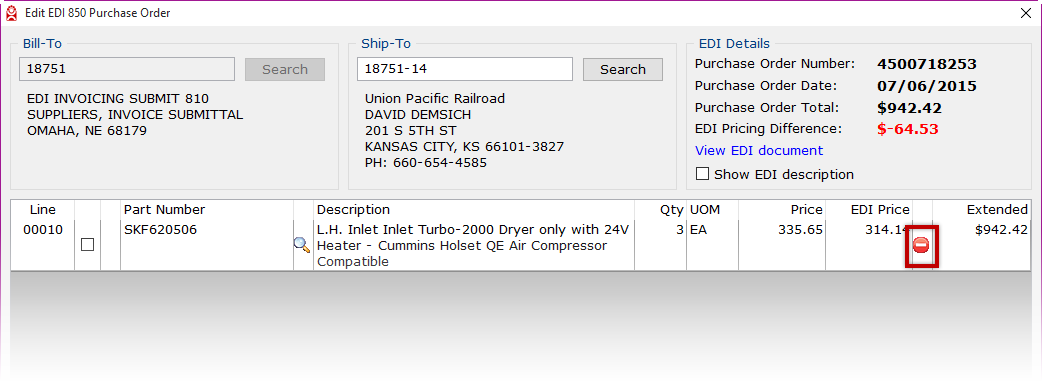
A green Icon with a “+” sign indicates the EDI line item price is greater than the customer’s price for that item.
A red icon with a “-“ sign indicates the EDI line item price is less than the customer’s price for that item.
The sum of the price difference is for all line items shown in the EDI Details area.
You can change the EDI price. This price change is discretionary. If the EDI price is acceptable, then no change is needed.
If the price difference is unacceptable, double click into EDI Price field to enter the correct price.
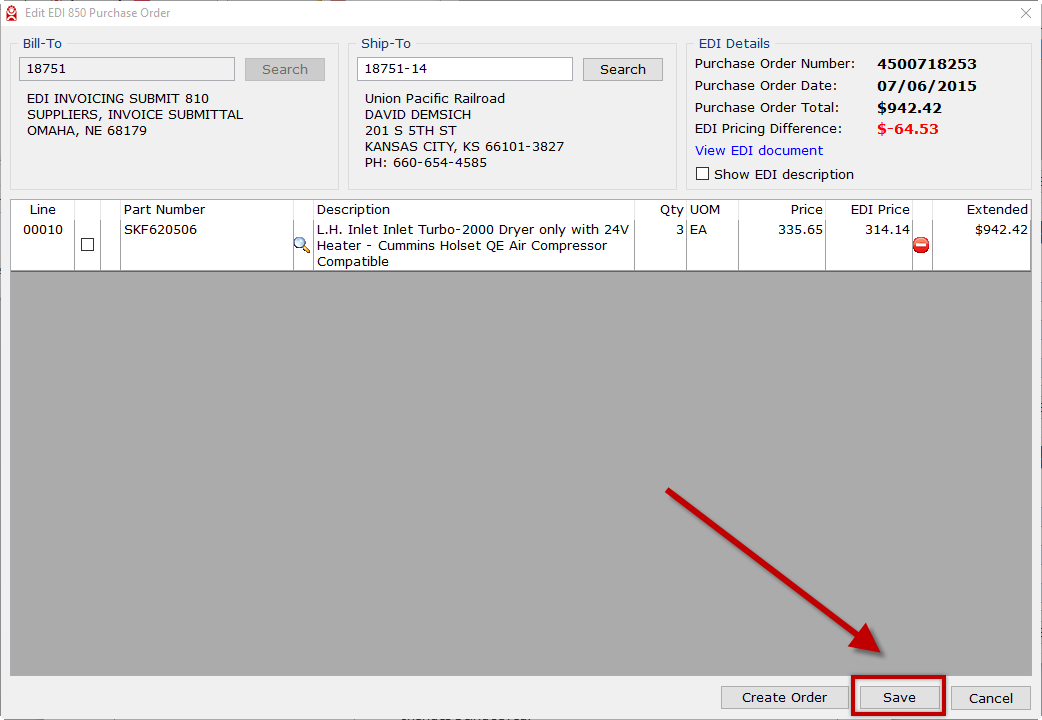
When all errors have been resolved for the EDI Purchase Order, the order is ready to be created. To create the purchase order, click the “Create Order” button at the bottom of the screen. This will close the “Edit EDI 850 Purchase Order” screen and return you back to the “EDI Sales and Shipping Dashboard” screen. The created EDI PO will be removed from the “Fix EDI 850 PO errors” panel.
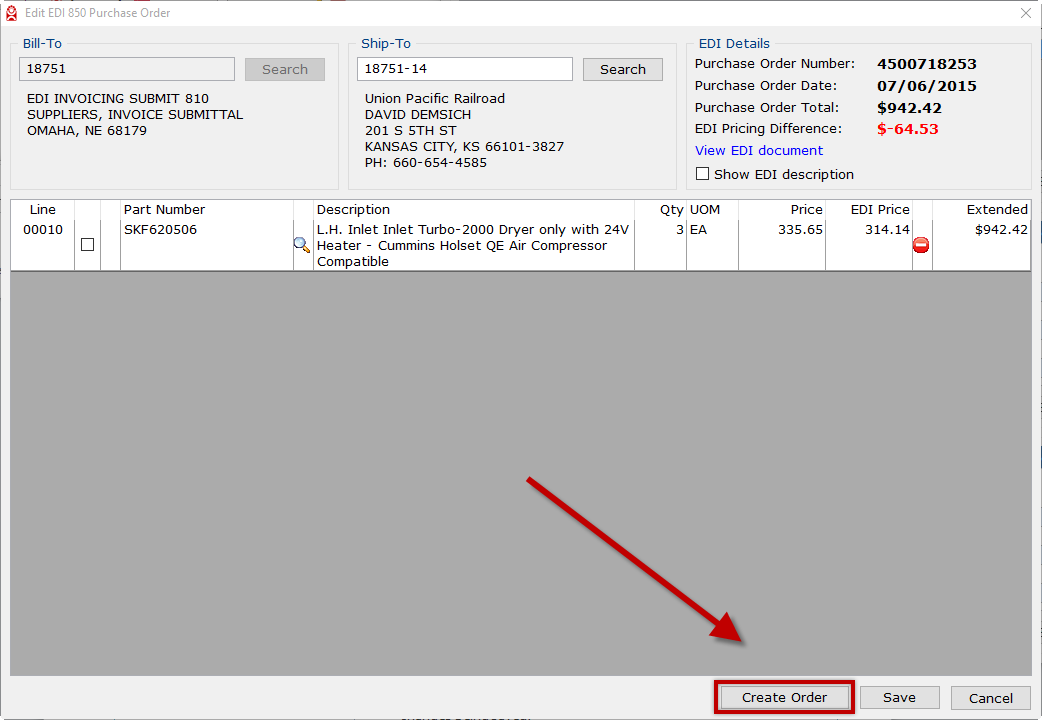
To save changes without creating the order, click the “Save “button at the bottom of the screen. This will close the “Edit EDI 850 Purchase Order” screen and return you back to the “EDI Sales and Shipping Dashboard” screen. When the same EDI PO is opened again, the previously saved changes are displayed.
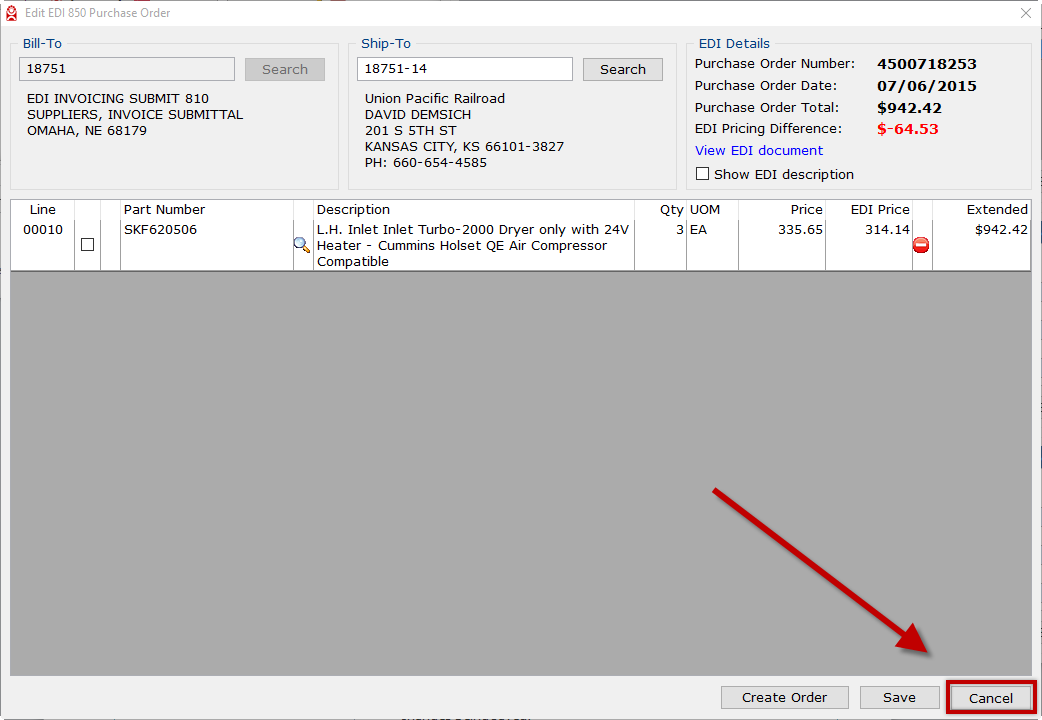
To cancel any changes made and not saved, click the “Cancel” button at the bottom of the screen or click the X in the upper right of the screen. This will close the “Edit EDI 850 Purchase Order” screen and return you back to the “EDI Sales and Shipping Dashboard” screen.
![]() © 2024 AutoPower
Corporation. All Rights Reserved.
© 2024 AutoPower
Corporation. All Rights Reserved.
Copyright Notice
AutoPower Corporation makes no warranty of any kind with regard to this material, including, but not limited to, the implied warranties of merchantability and fitness for a particular purpose. AutoPower Corporation shall not be liable for errors contained here in or for incidental or consequential damages in connection with the furnishing, performance, or use of this material. The software described in this document is furnished under a license agreement and nondisclosure agreement. The software may be used or copied only in accordance with the terms of these agreements.
This document contains proprietary information, which is protected by copyright laws. All rights are reserved. No part of this document may be copied,reproduced, transmitted, or translated into another language in any form or by any means, electronic or mechanical, for any purpose, without the express written permission of AutoPower Corporation. The information contained in this document is subject to change without prior notice. Companies, names, and data used in examples herein are fictitious unless otherwise noted.